🏅 wp99.in has been continuously providing regular updates to the customers since 2016 to 2025 🏅
WooCommerce BluePay Gateway

Download Files
₹99.00 ₹399.00Price range: ₹99.00 through ₹399.00 + GST TAX
Verified from VirusTotal
Free Lifetime / One Year Update.
100% Original Product and Virus Free.
100% Untouched and Unmodified Files.
Unlimited Website Usage
Verified From
Product Details
Version: 1.1.8
Last Update: 7 Feb 2024
Release Date: 15 Mar 2020
Uses: Unlimited Domain
Products Source: Original Authors.
Future Updates: One Year / Lifetime
License Type: GPL
Setup and Configuration
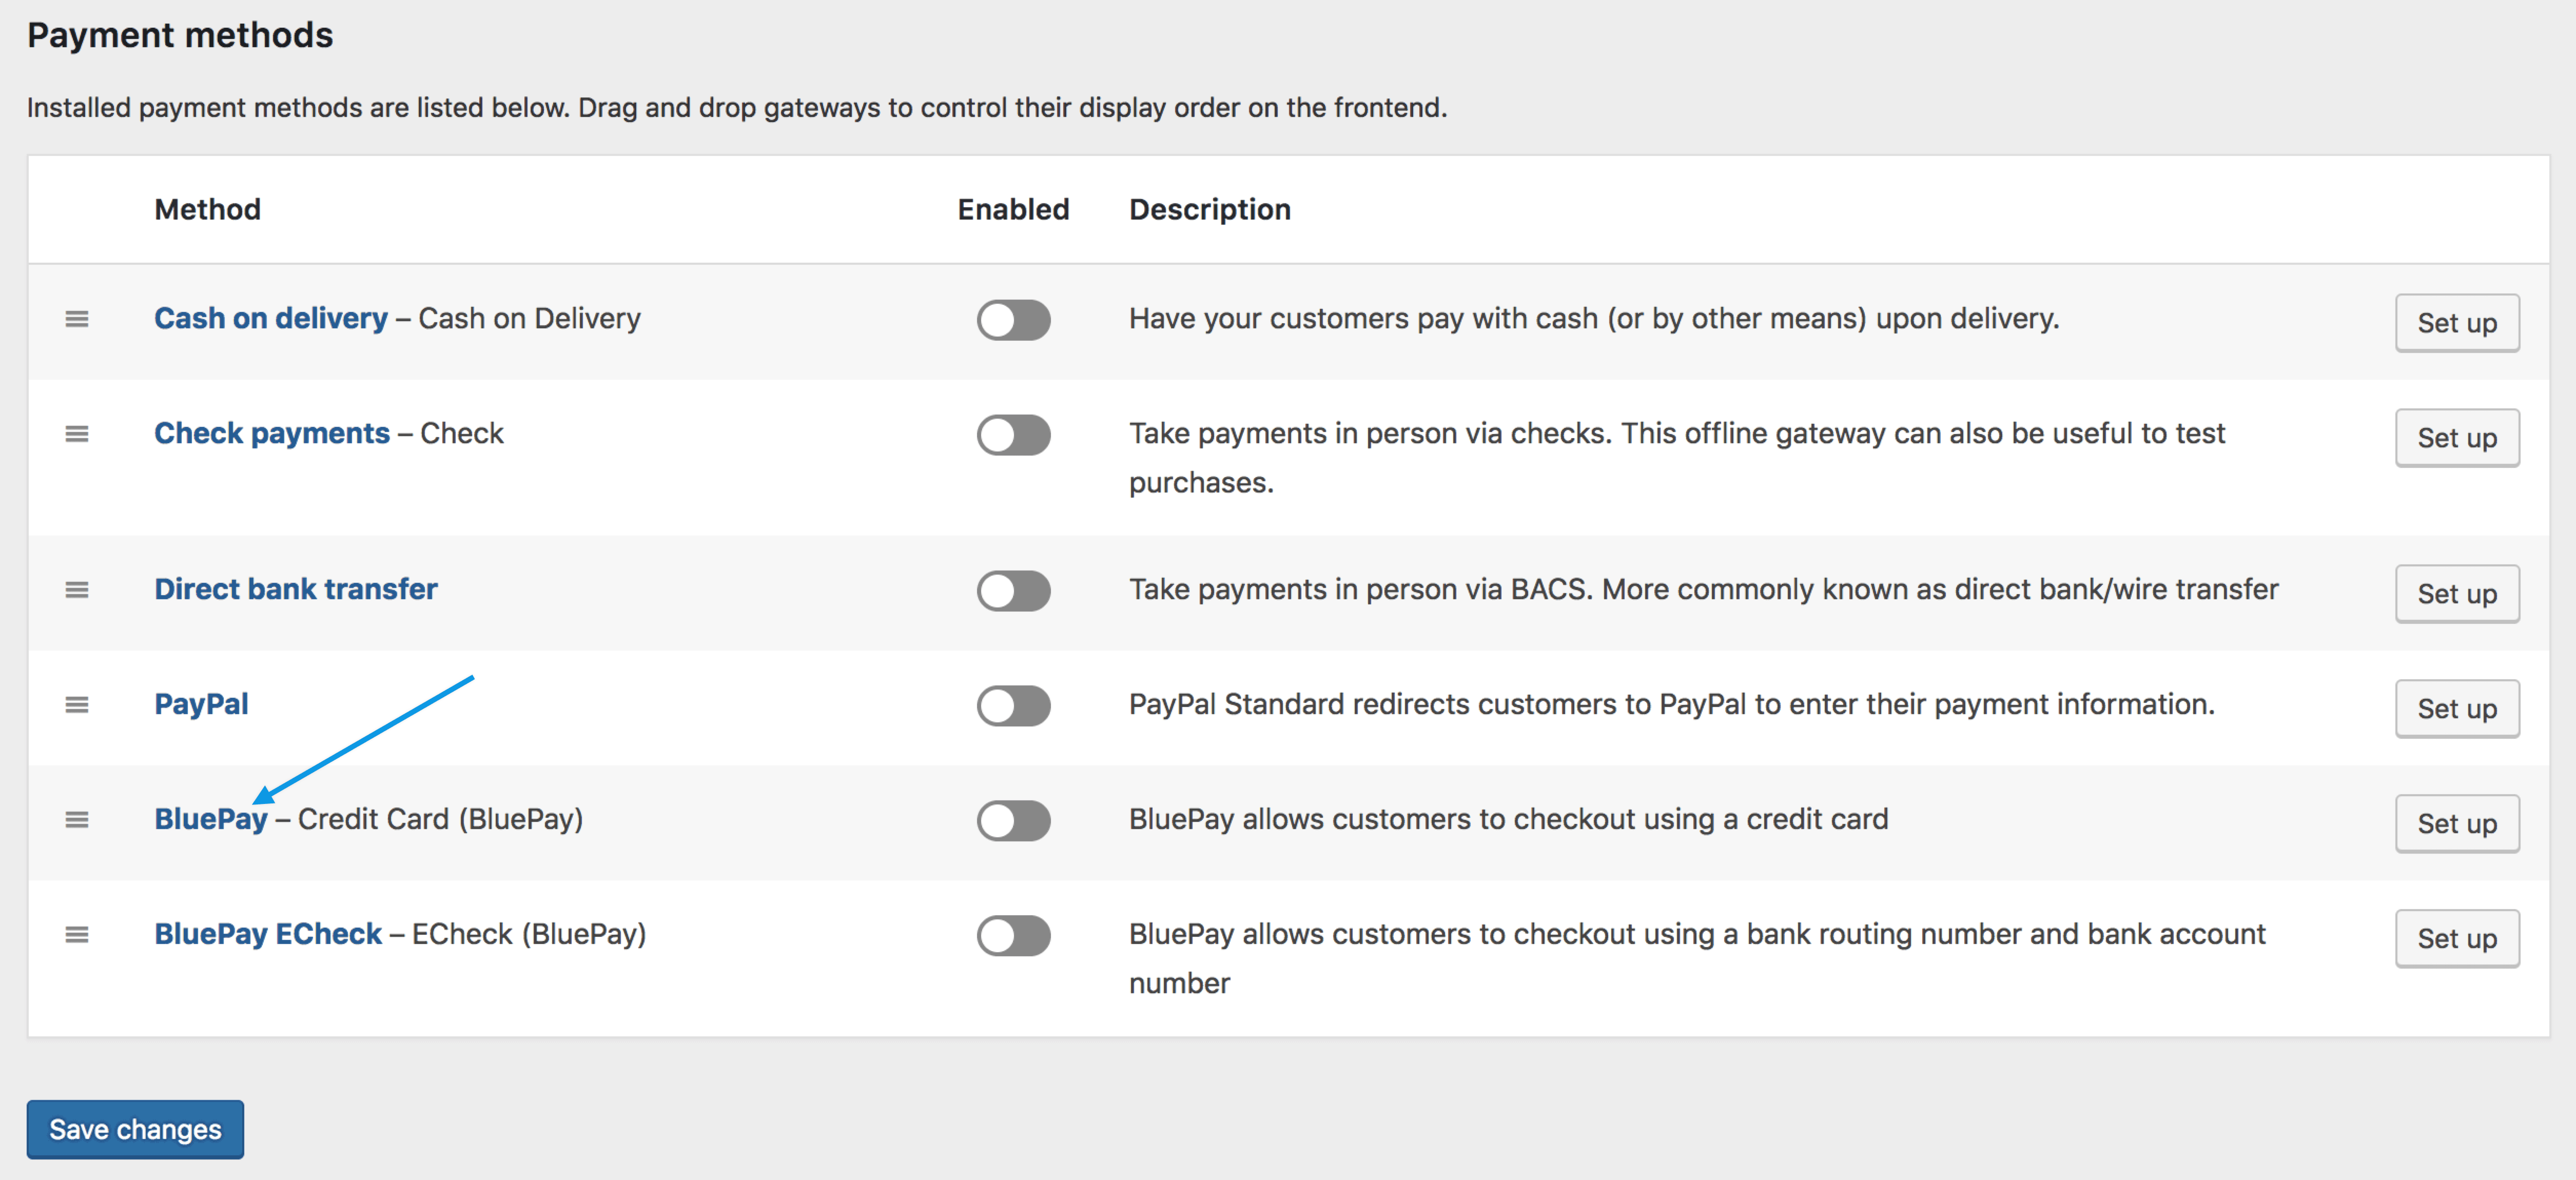
- Go to: WooCommerce > Settings > Payments.
Note: ‘Payments’ formerly called ‘Checkout’ prior to WooCommerce 3.4. - Select BluePay – Credit. This takes you to the Settings screen.

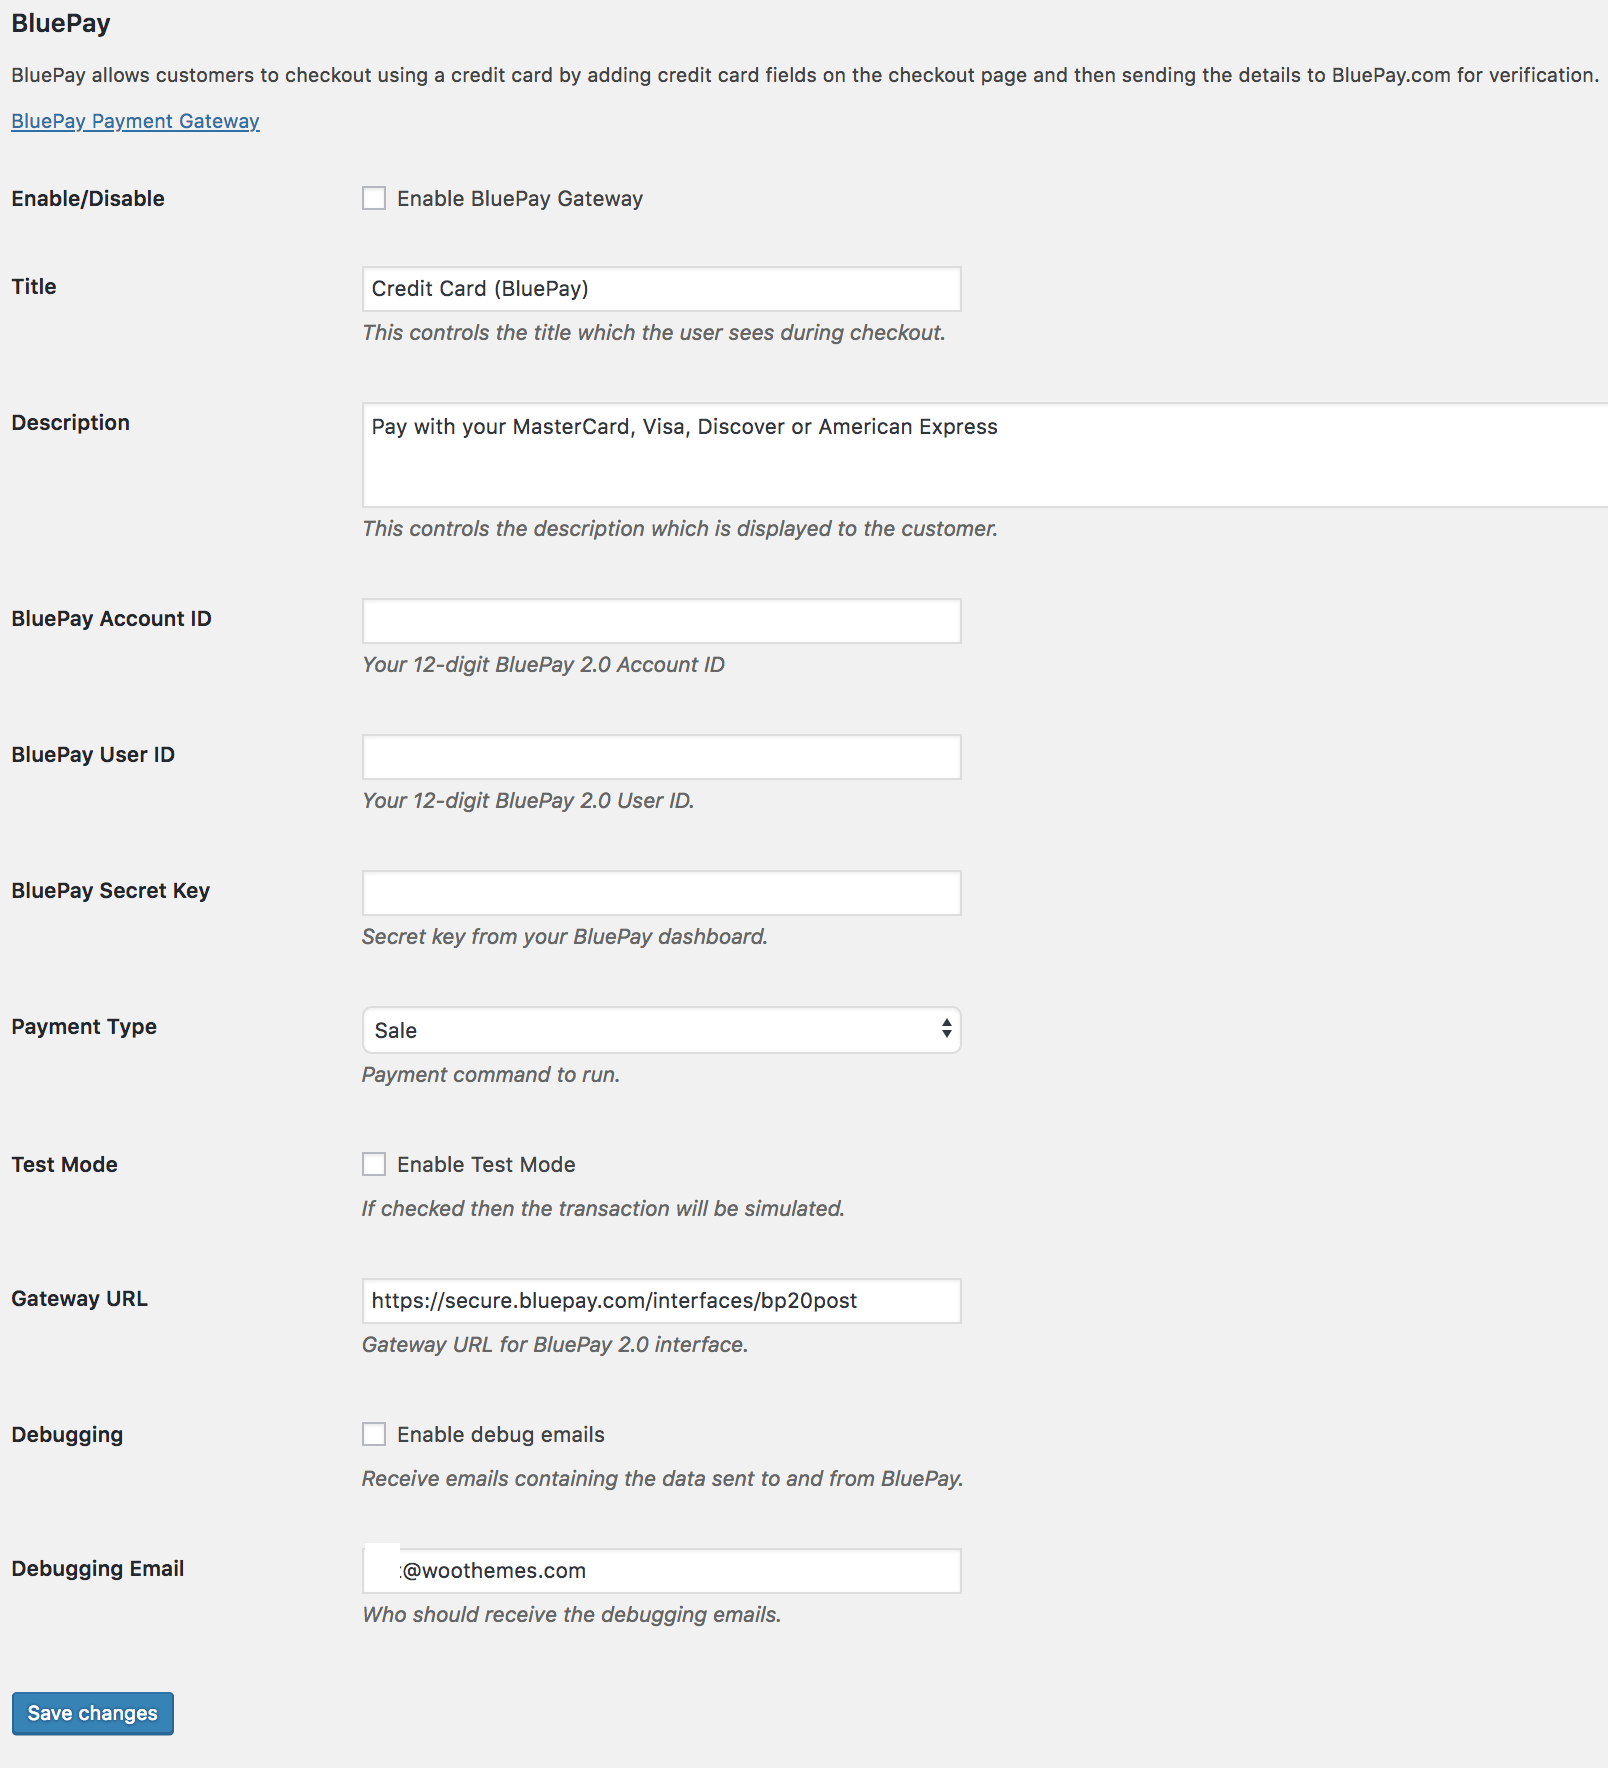
- Configure your settings:
- Enable/Disable – Enable to use. Disable to turn off.
- Title – Choose the title shown to customers during checkout
- Description – Add info shown to customers if they use BluePay, e.g., what credit cards you accept
- Enter the BluePay Account ID, BluePay User ID, and BluePay Secret Key from your BluePay account.
- Choose which Payment Type you would like to use between Sale (will authorize and capture funds at checkout) and Authorize Only (will only authorize payment, funds will need to be captured within your BluePay merchant account).
- Enable Test Mode if testing or developing before going live. Remember to disable.
- Gateway URL Override
- Enable debug emails and enter an email address if troubleshooting or wishing to receive logs. Otherwise, leave disabled.
- Save changes.
- Repeat the same steps for BluePay eCheck starting from WooCommerce > Settings > Payments if you wish to enable that option.
Be the first to review “WooCommerce BluePay Gateway”
You must be logged in to post a review.
- Login withGoogle

₹399.00 ₹599.00Price range: ₹399.00 through ₹599.00 + GST TAX

₹399.00 ₹699.00Price range: ₹399.00 through ₹699.00 + GST TAX

₹399.00 ₹699.00Price range: ₹399.00 through ₹699.00 + GST TAX

₹399.00 ₹599.00Price range: ₹399.00 through ₹599.00 + GST TAX

₹399.00 ₹599.00Price range: ₹399.00 through ₹599.00 + GST TAX

₹399.00 ₹599.00Price range: ₹399.00 through ₹599.00 + GST TAX

₹399.00 ₹599.00Price range: ₹399.00 through ₹599.00 + GST TAX

₹399.00 ₹599.00Price range: ₹399.00 through ₹599.00 + GST TAX

₹399.00 ₹599.00Price range: ₹399.00 through ₹599.00 + GST TAX

₹399.00 ₹599.00Price range: ₹399.00 through ₹599.00 + GST TAX

₹399.00 ₹599.00Price range: ₹399.00 through ₹599.00 + GST TAX

₹399.00 ₹599.00Price range: ₹399.00 through ₹599.00 + GST TAX


Reviews
There are no reviews yet.